
This week I thought I’d give a behind-the-scenes view of how I approach an encaustic painting.
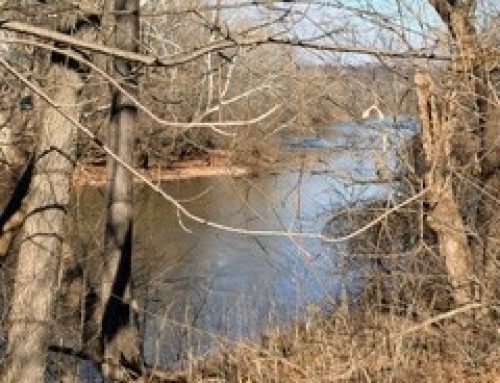
A few weeks ago I traveled through the beautiful hillside of Hillsboro, Virginia, on my way to meet with a local winery about an art exhibit. This scene came into view and I was immediately drawn to the geometric design of the haybales against the solid gold and blue background. Yeah! I found inspiration for my next painting in my winter landscape series.

I started with a 10″x10″ cradled wood panel unprimed. There really isn’t a need to prime the board unless you are using transparent pigmented paint. If you do prime, use encaustic primer for the best results.
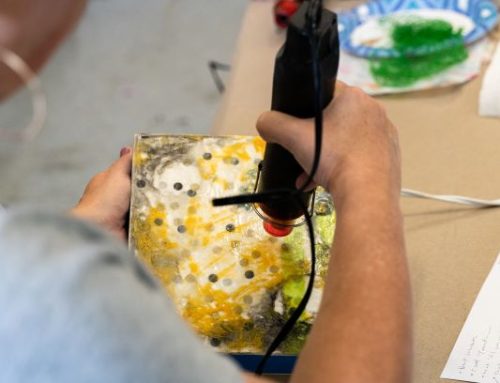
Using painter’s tape, I chose the horizon placement and filled in the sky with several layers of light blue encaustic. (So I don’t have to keep repeating myself — after EVERY layer I fuse with a blow torch or hot gun.)

first layer of encaustic paint
For the sky, I paint on a layer of white encaustic which I will scrape back to achieve great visual texture in the following step. The treeline goes in with two different browns using a soft brushing technique to blend up into the sky.

Here’s the scraping I referred to earlier. Very gently, I scrape off the white where I don’t want clouds to be. Be sure the wax isn’t too hot or you’ll scrape down to the board. No worries if this happens. Just fill in with the paint you scraped off and fuse. After I’m happy with the placement of the clouds, I fuse to get a wispy look in the clouds.

I then scrape the treeline into a more realistic representation.

Time to pull off the tape and work on the bottom half of the painting. Just like the sky, I apply a several layers of yellow ochre encaustic, then brown, then scrape back the brown. Highlights of the grass is rendered using dry brush technique over scraped in crop lines.

Yeah, my favorite part is next — adding the cool geometric haybales! A stencil is definitely the way to go here. Dark brown paint is applied using the stencil and I hand paint the highlights taking a good amount of time to get the color just right.

You’ll see in my paintings that I’m big on texture. My favorite tool is a sculpting knife used to scrape away the tinyest bits of wax and create fun etchings of grass.

More time is spent on refining color, adding the snow in the field and more texture to the haybales. I went back and forth on whether to add the large trees behind the bales. Finally, I decided to concentrate on the geometric design of the bales and let the trees go. Do you think that was the right choice?

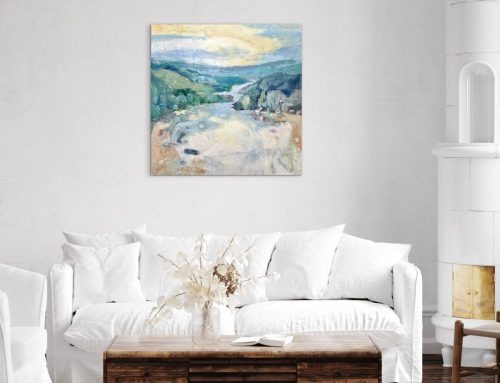
Final painting, “Winter Haybales”. Not a very creative name, but good for the SEO’s!
If you liked this tutorial, subscribe to my YouTube channel for video tutorials as well. I also offer encaustic and mixed media workshops in Purcellville, VA.

Love, love love seeing your inspiration and process. I think you made all the right choices! Bravo!
Thank you so much. It means a lot to me to know someone is reading my blog. :)