The sky is a crucial element in landscape paintings, as it establishes the mood and atmosphere in the artwork. Capturing the sky’s essence requires attention to detail and an understanding of its parts. Consider these top three elements when depicting the sky in your next landscape.
1. Color and Light
The sky’s colors and light are key to capturing a mood. This applies to either the scene before you or a photo. Here are some key aspects to keep in mind:
The sky’s color shifts as morning dawns, noon beats down, and dusk falls. At sunrise and sunset, the sky is often bathed in warm hues like oranges, pinks, and reds. Skies blaze with vibrancy at noon, transitioning to rich purples and blues by dusk. Observing these variations can help you accurately capture the sky’s essence in your painting.
In most paintings, the sky should be the lightest value. If a painting feels off, the sky is usually too dark. This darkens the rest of the values and makes the work feel somber. This is even more of a common occurrence in outdoor painting. Tune your values to the sky and you will get a better read on the painting. Be careful, especially on overcast days, when the sky may seem dark and dreary. There is a lot more light than you think.
– Gradients: The sky is rarely a uniform color. It has subtle gradients that merge seamlessly, shifting between hues. For example, the sky appears as a deeper blue directly above your head, gradually lightening and becoming cooler as it approaches the horizon. I like using ultramarine blue (warmer) for the “top” of the sky and cobalt blue (cooler) near the horizon.
This natural gradient from warm to cool is not only vertical. It is also a horizontal dance of light. As the sun moves across the sky, it influences the temperature and intensity of the colors we see. Near the sun, the colors appear warmer, with hues of orange and yellow, reflecting the sun’s warmth. As we look further away from the sun, the colors shift to a cooler hue.
– Atmospheric Perspective: Distant objects, including parts of the sky, often appear lighter and less saturated. This is due to the scattering of light by particles in the air. This phenomenon, called atmospheric perspective, can add depth and realism to your painting. To achieve this effect, use lighter and less saturated colors for distant areas of the sky.
2. Clouds and Their Forms
Clouds add character and movement to your sky. Here are some considerations when painting clouds:
– Variety of Shapes: Clouds have many shapes and sizes. Each contributes differently to the overall composition. Cumulus clouds are fluffy and well-defined, often evoking a sense of warmth and calm. Cirrus clouds are thin and wispy, adding elegance and movement to the sky. Stratus clouds form horizontal layers, creating a sense of vastness and depth. Including a variety of cloud shapes can make your sky more interesting and realistic. Take a look at a sky filled with clouds and you’ll notice that the size of the clouds decreases closer to the horizon. They will also tend to be warmer and lighter in value.
 – Edge Treatment: The edges of clouds can greatly influence their appearance. Hard, well-defined edges suggest cumulus clouds, while soft, blurred edges indicate cirrus clouds. Using techniques like dry brushing or blending can help you achieve the desired variety of edge treatment for different types of clouds. A sharper edge will draw the viewer’s eye. Softer edges will create harmony in the sky.
– Light and Shadow: Clouds are three-dimensional objects with volume. To convey their form more realistically, it’s important to add light and shadow. The side of the cloud facing the light should be lighter. The opposite side should be darker, with a medium value between the two. This contrast creates a sense of depth and dimension. White infused with a touch of cadmium yellow brings vibrancy to cloud highlights.
3. Weather and Mood
The sky plays a crucial role in conveying the mood and weather in your landscape. Here are some tips for using the sky to enhance the atmosphere:
Calm vs. Stormy: A clear, bright sky with soft, white clouds can suggest a calm, peaceful day. In c ontrast, dark, heavy clouds can signal a storm. They add drama and tension to your painting. You can convey different weather and emotions by choosing colors and cloud shapes.
Dynamic Skies: Consider incorporating dynamic elements like rain, lightning, or the movement of clouds to add drama and interest to your sky. These elements can make your landscape more engaging and livelier. For instance, painting a sky with storm clouds and lightning can create a sense of excitement and urgency.
Seasonal Effects: Different seasons bring different sky characteristics. A winter sky might have a pale, cool quality with soft, diffused light, while a summer sky is often vibrant and intense with strong contrasts. Paying attention to these seasonal variations can enhance the authenticity of your painting.
Practical Tips for Painting the Sky
Unite elements by following these practical painting tips for the sky:
Experiment with a variety of brushes: Use a large, soft brush to block in sky areas quickly. Establish the main cloud forms with smooth, broad strokes using a flat brush to create edges. Add texture and depth with gentle, layered brushwork. Capture subtle color shifts with nuanced, blending hues with a soft round brush. Illuminate the sky with touches of vibrant, pure highlights using a small detail brush. Make sure to gradate shades from light to dark with seamless transitions.
Use Reference Photos: As you know, sky colors can change in a second. If you’ve ever tried painting a sunset outdoors, you’ve experienced this frustration. Reference photos can be invaluable for capturing the nuances of the sky. Take photos of the sky at different times and in various weather conditions. Use them as references for your painting. I have multiple sketchbooks filled with sky variations of a single landscape so I can easily look back to remember how I created a particular composition or color.
Experiment with Techniques: Try different painting techniques to achieve the desired effects. For example, using wet-on-wet techniques can create smooth gradients, while dry brushing can add texture and softness to clouds. In my sketchbooks, I like to record the color combinations and techniques I use to skip the frustration of trying to remember what I did that day.
Layering and Blending: Building up layers of color and blending them seamlessly is key to creating realistic skies. Start with a thin base layer and gradually add details in thicker and lighter-valued paint. I love painting with encaustic beeswax paint. It doesn’t need the bottom layers to dry before adding the next. When working with gouache, I’ll get a muddy mess if I don’t allow the bottom layers to dry first.
Pay Attention to Scale: Ensure that the scale of the sky and clouds is consistent with the rest of your landscape. Before you start a painting, decide if you want to draw attention to the sky or the landscape in your composition. If you choose the sky, start your horizon 2/3 down from the top of the canvas. Position your horizon line 1/3 from the top for a landscape-dominant composition. Keep in mind that larger, more dramatic clouds can dominate the composition, while smaller, subtler clouds can serve as accents.
Conclusion
Painting the sky in a landscape is a tough but rewarding challenge. It can greatly enhance your artwork’s impact. By closely watching the interplay of color and light, you can create skies that are both realistic and emotionally resonant. Pay attention to the forms and moods of clouds and the weather. Remember, practice and observation are key. Spend time studying the sky, experimenting with different techniques, and refining your skills. Create a sky inspiration photo gallery on Pinterest or a file. Then, start a sketchbook with as many sky variations as you can find. With patience and dedication, you’ll be able to capture the beauty and majesty of the sky in your landscape paintings.
Happy painting!
____________________
Learn more about me as an artist and instructor HERE.
Click this LINK for FOUR WAYS I can help you on your artistic journey!
Join my newsletter private list HERE to receive information about new art releases and upcoming workshops.
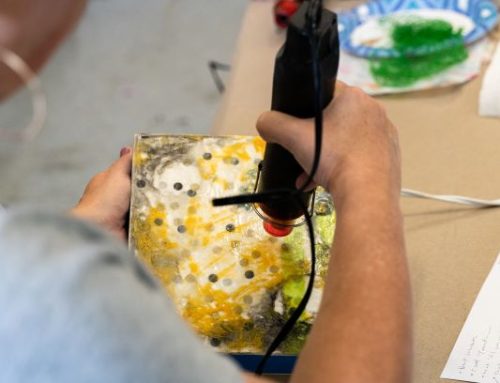
I’ve helped hundreds of artists and art lovers learn the joy of painting with beeswax and fire! Learn more about my online encaustic painting course for beginners titled, “Encaustic Bootcamp: A guide to beginning encaustic painting” by clicking this LINK.